Two days ago, I wrote an article for this week’s post titled “Basic Watercolor Techniques Everyone Must Know.”
Unpublished. And saved in draft.
I’ve discovered something even more interesting and engaging. Instead of sticking with the boring basics, I’ve decided to focus on a technique that offers a more dynamic and hands-on learning experience.
I’d like to call it “The Glazing Technique Exercise”. This approach is far from boring and allows for the exploration and mastery of multiple watercolor techniques through practice.
WHAT IS GLAZING TECHNIQUE?
The watercolor glazing technique is a method where you paint a thin, transparent layer of color over a dry layer of watercolor. This helps you build up depth, create new colors, and add richness to your painting without disturbing the layers beneath.
This is a very simple practice. You will need the following six colors:
Why these six colors?
The six colors that I have listed cover a broad spectrum of hues and provide a versatile palette. Here's what stands out:
Primary Colors: You have a good range of primary colors:
Lemon Yellow and New Gamboge for yellows.
Quinacridone Rose and Pyroll Red for reds.
Pthalo Blue and French Ultramarine for blues.
Warm and Cool Variants:
Lemon Yellow is a cooler yellow, while New Gamboge is warmer.
Quinacridone Rose is a cooler red, whereas Pyroll Red is warmer.
Pthalo Blue is a cooler, more intense blue, while French Ultramarine is warmer and more muted.
Color Mixing Potential:
You can mix these colors to create a wide range of secondary and tertiary colors.
For example, mixing Lemon Yellow or New Gamboge with Pthalo Blue or French Ultramarine will give you different shades of greens.
Mixing Quinacridone Rose or Pyroll Red with French Ultramarine will yield various purples.
Glazing Opportunities:
Since you have both cool and warm versions of primary colors, you can experiment with glazing to create subtle shifts in temperature and depth in your paintings.
Overall, this palette is very balanced and versatile, allowing you to achieve a wide range of colors and effects in your watercolor work. It’s particularly effective for both bright, vibrant scenes and more muted, naturalistic ones.
Step 1:
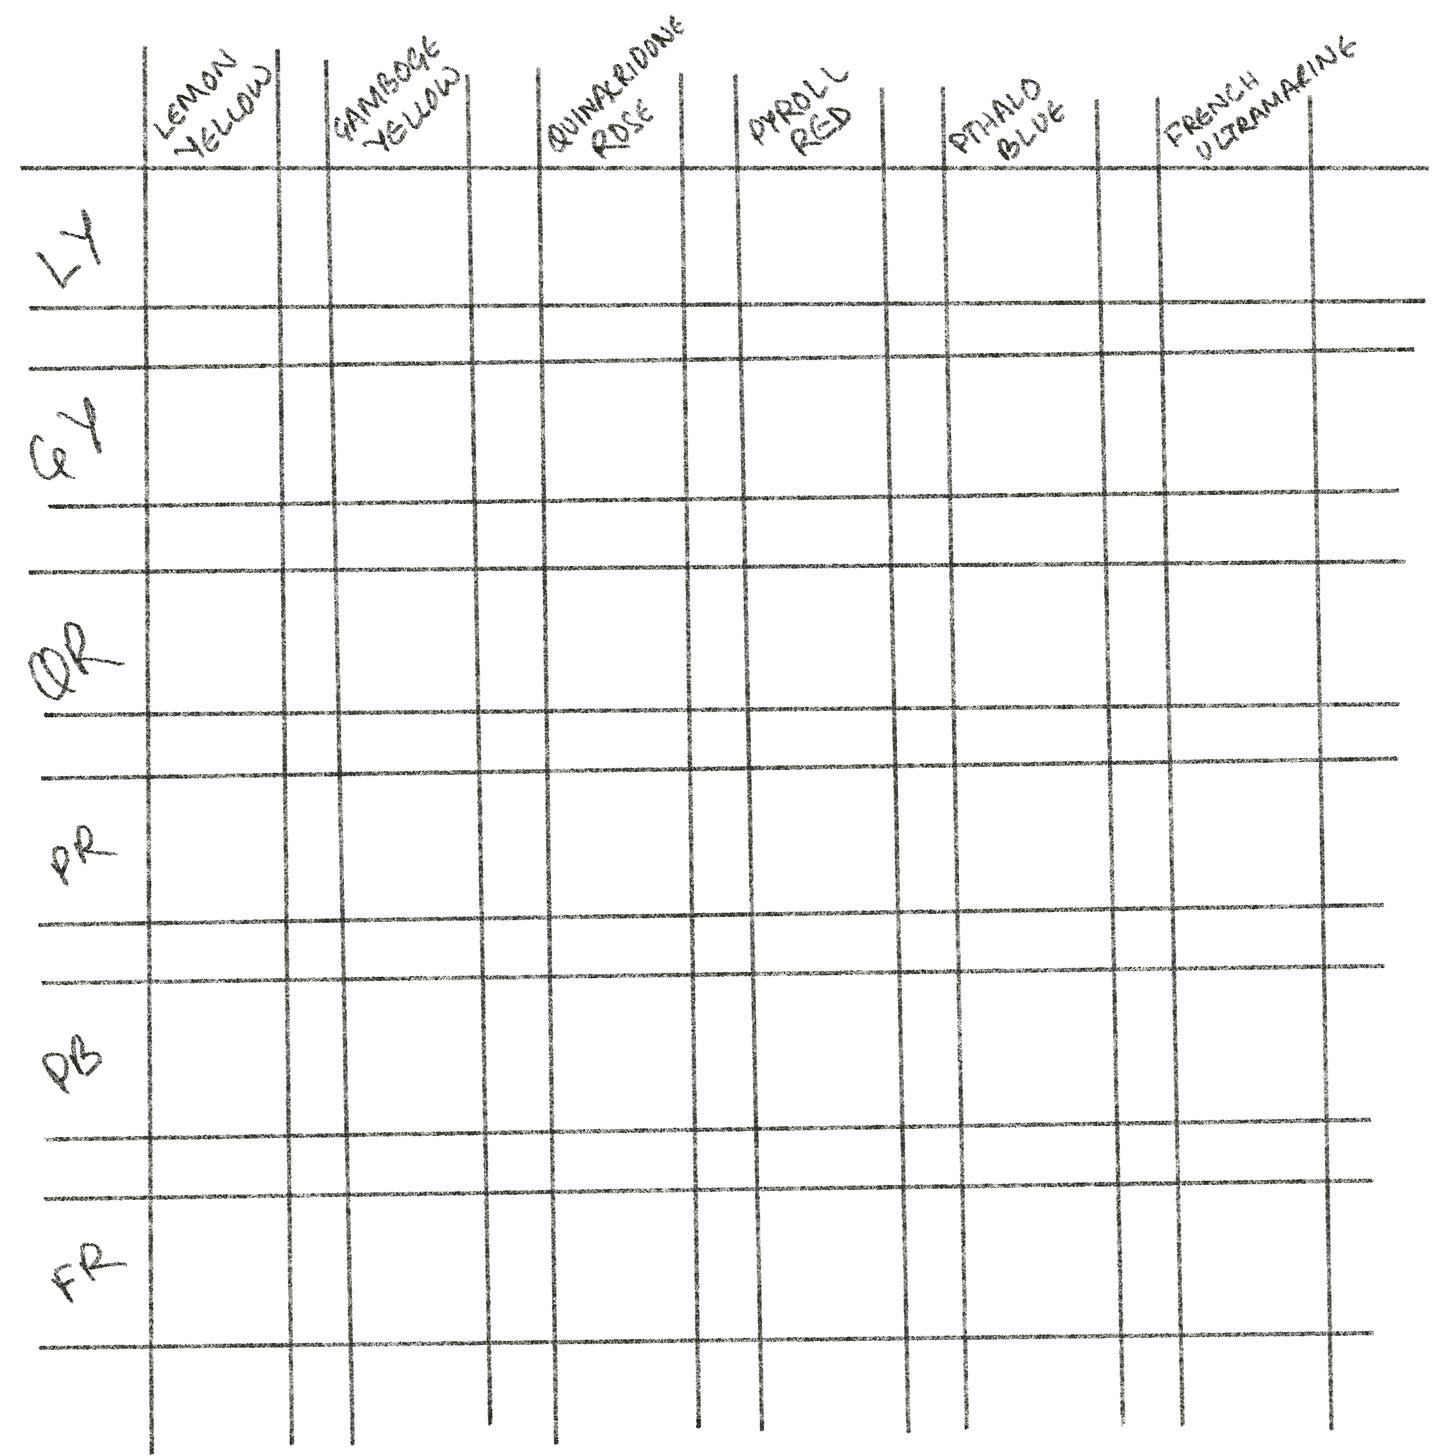
Start drawing lines on your paper using a pencil & a ruler in the following manner:
Mark the names of the colors as illustrated above. The labels on the left side are abbreviations of the color names like LY for Lemon Yellow, GY for Gamboge Yellow etc.
Step 2:
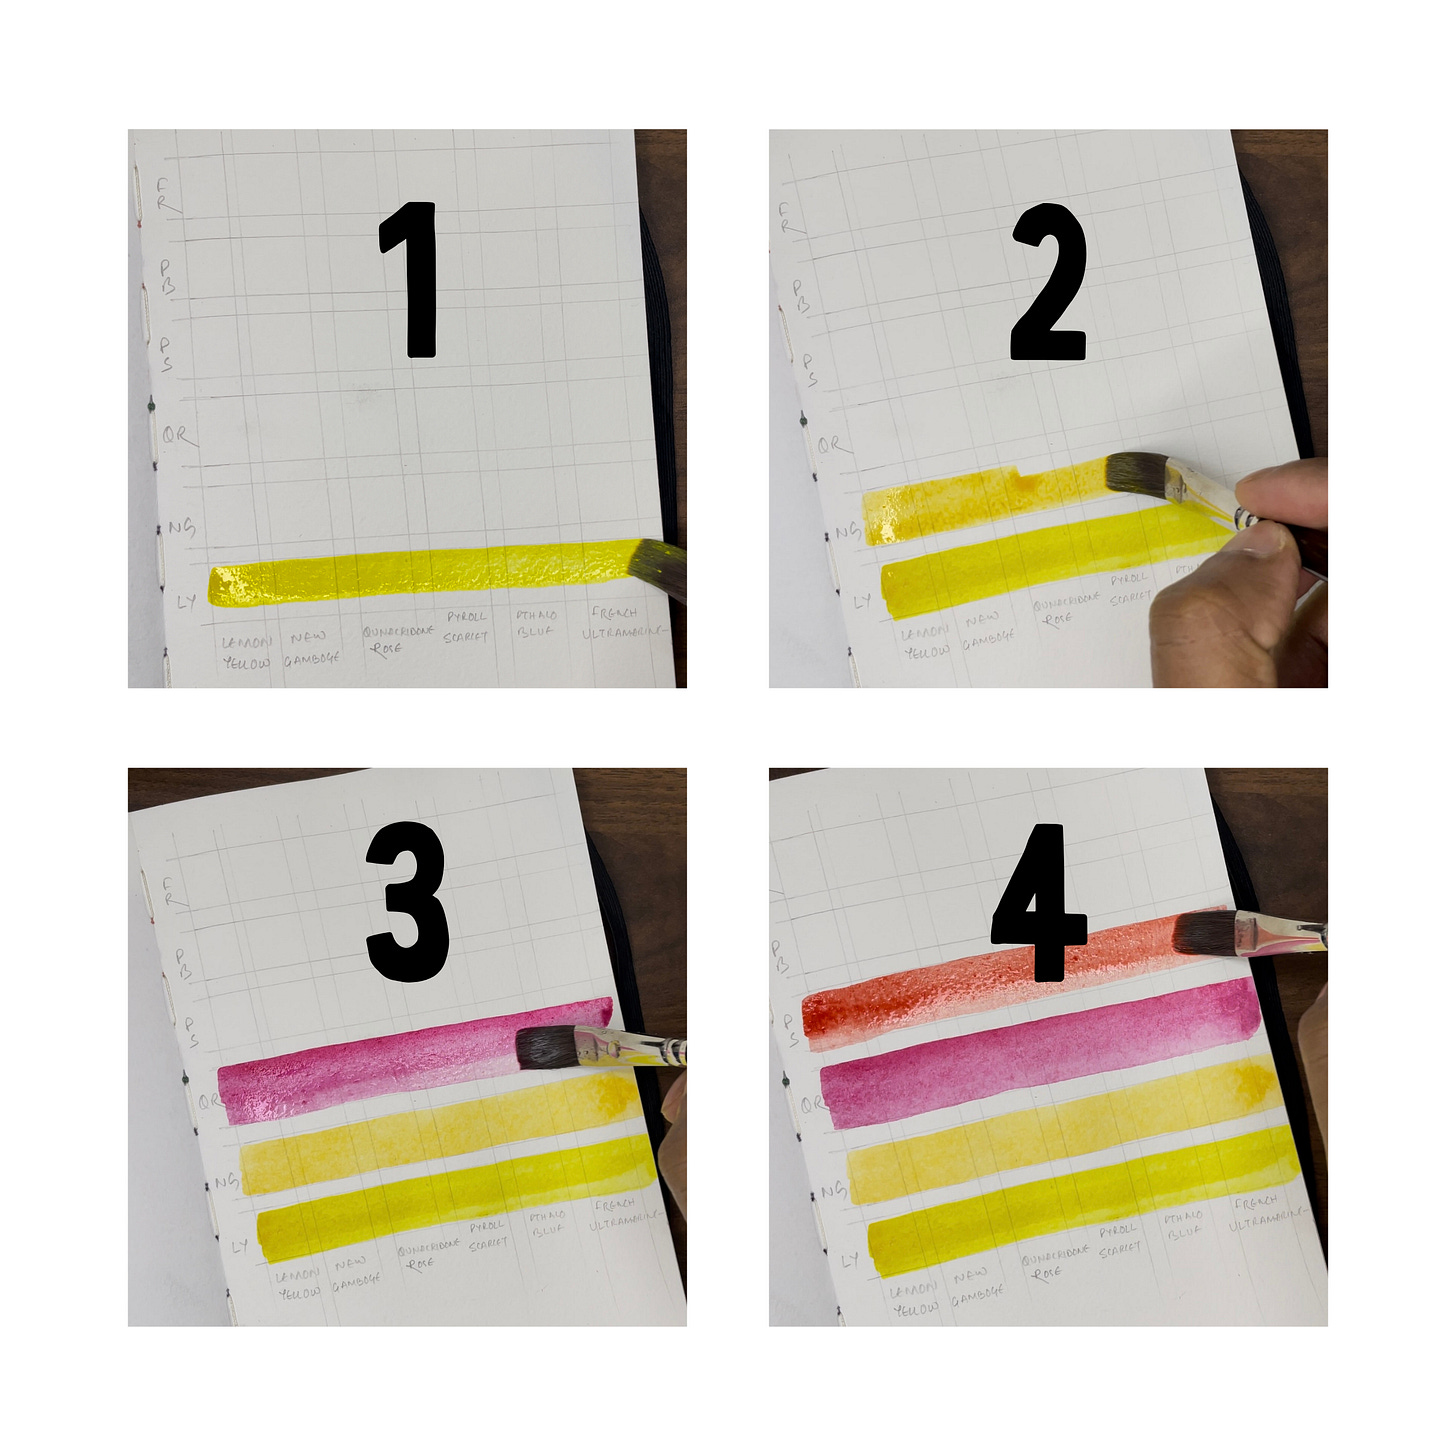
Start painting in the spaces between these lines as marked with the colors. A. flat brush is ideal for this exercise. But that doesn’t mean you cannot do it with a round brush. Just take a bigger one.
Keep two jars of water and use one of them to clean your brush before moving to the next color. This will avoid muddy results.
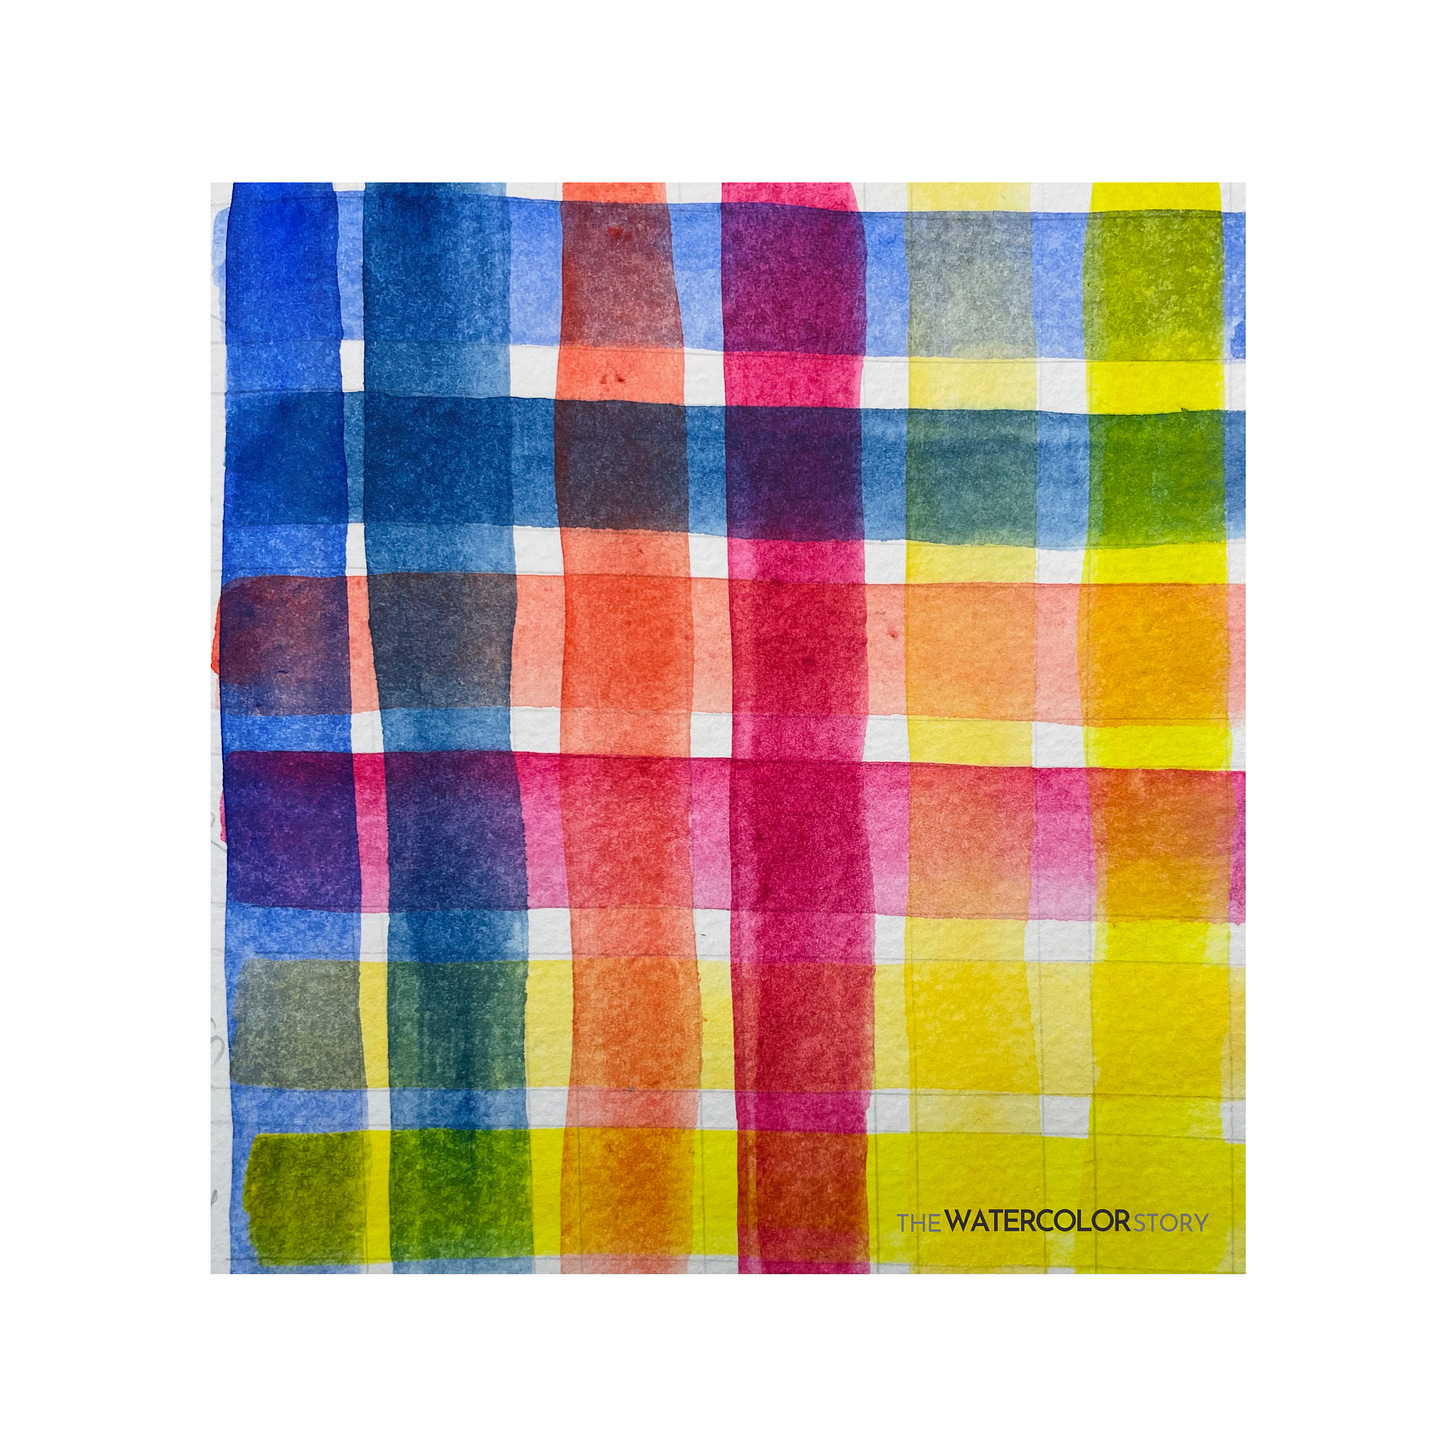
Just look at all the beautiful colors you can derive from these six limited colors. In this exercise, you are essentially training your brain to mix colors effortlessly while painting.
You can also make your own limited color palette out of these six colors.
In addition, you're also practicing another essential watercolor technique: “Wet on Dry.” As the name suggests, this involves painting with wet paint over a dry surface or a dried layer of color.
I suggest you practice this technique a few times until you feel confident in knowing which colors to mix together.
Keep practicing and exploring these techniques, and I look forward to sharing more insights with you next week!
Also Read: What's in my Art Toolkit?


